StoryBoardを使って、NavigationController+TableViewControllerでサンプルアプリをつくります。
- つくるもの
ナビゲーションバーつきのTableViewController
セルは動的に生成、クリックするとViewControllerに遷移
- 手順
-
- プロジェクトの作成
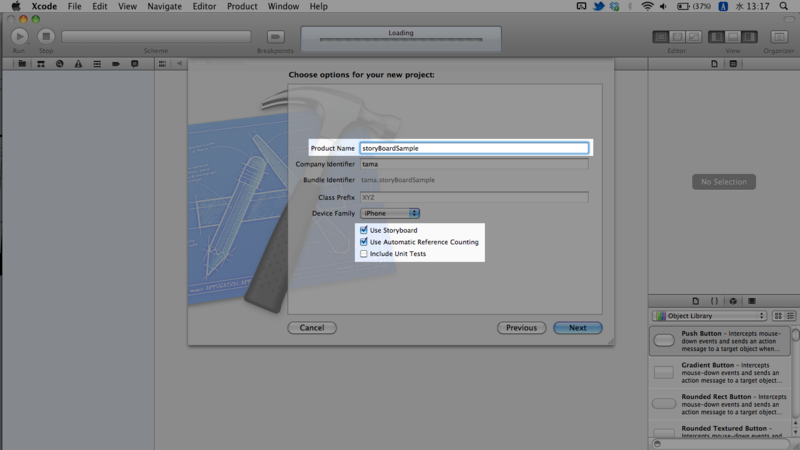
Single View Applicationを選択。
今回Product Name(プロジェクトの名前)は「sotryBoardSample」にしました。
下部の"Use StoryBoard"と"Use Automatic Reference Counting"にチェック。
Nextを押し保存して、プロジェクトを作成します。
-
- TableViewControllerの配置
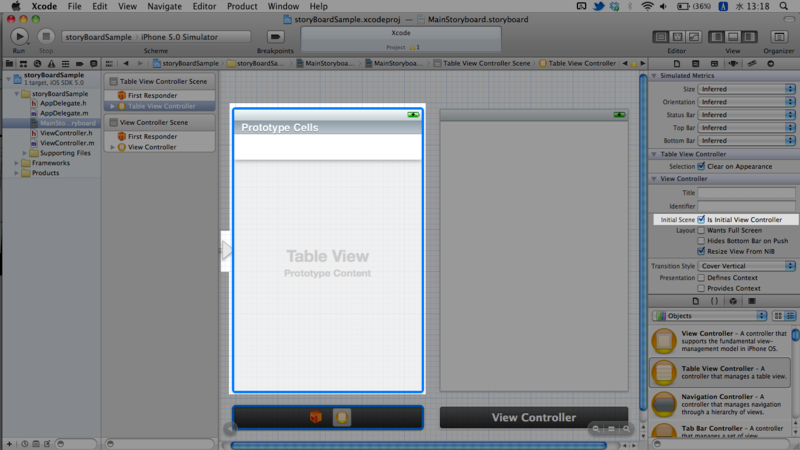
右ペインが出ていなければ開き、右下からTable View ControllerをすでにあるViewControllerの左へドラッグしてきます。
ぽい。
右ペインの"Is Initial View Controller"にチェックを入れます。
アプリを起動すると、このTableViewControllerが先に表示されるようになります。
-
- NavigationControllerの挿入
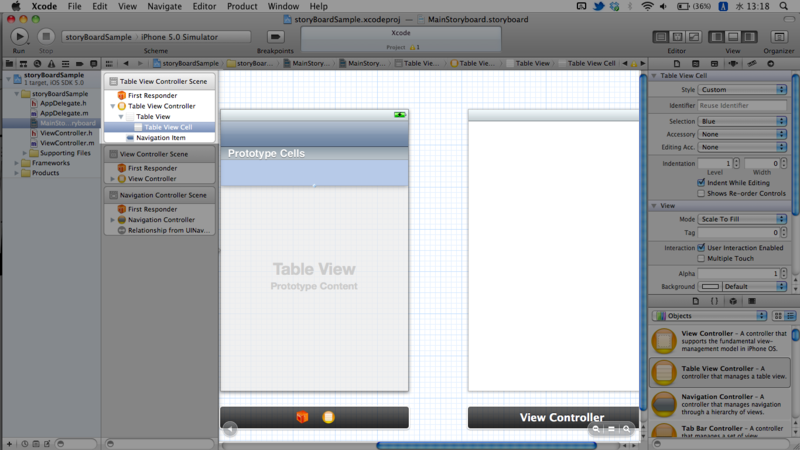
フォーカスはTableViewControllerに合わせたまま、上部メニューの"Editor"から"Embed In"→"Navigation Controller"を選択。
TableViewControllerの更に左側に、NavigationControllerが挿入されました。
-
- TableViewController→ViewControllerへ紐付け
中央ペインのセル部分をクリック。
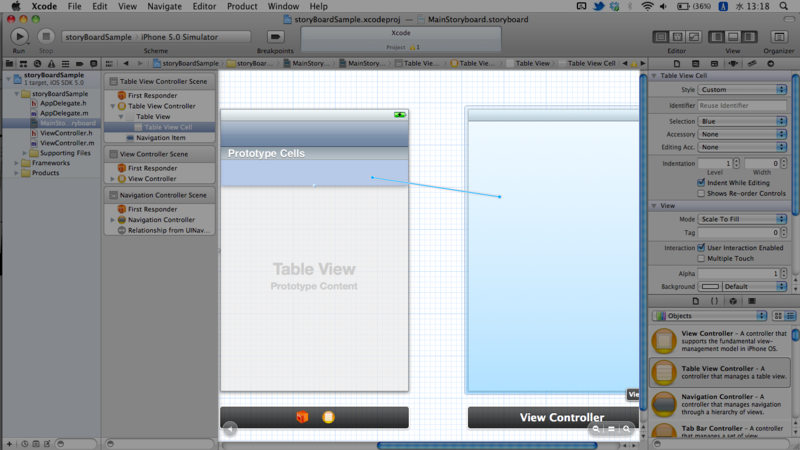
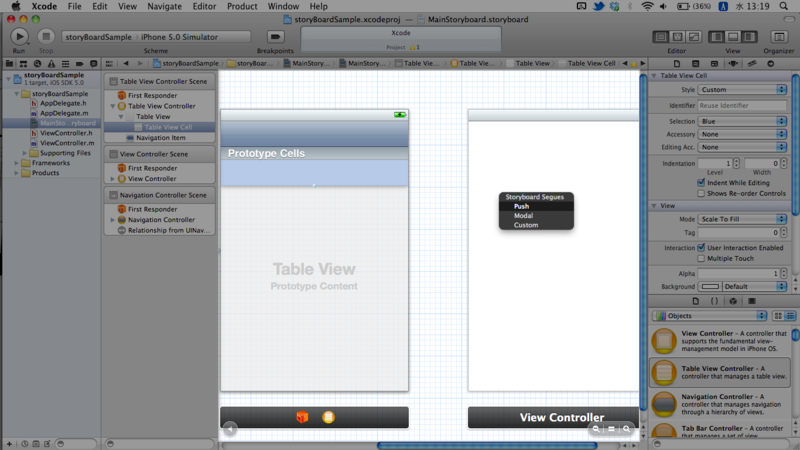
control+ドラッグして、右のViewControllerではなす。
ビューの遷移方法を聞かれるので、pushを選択。
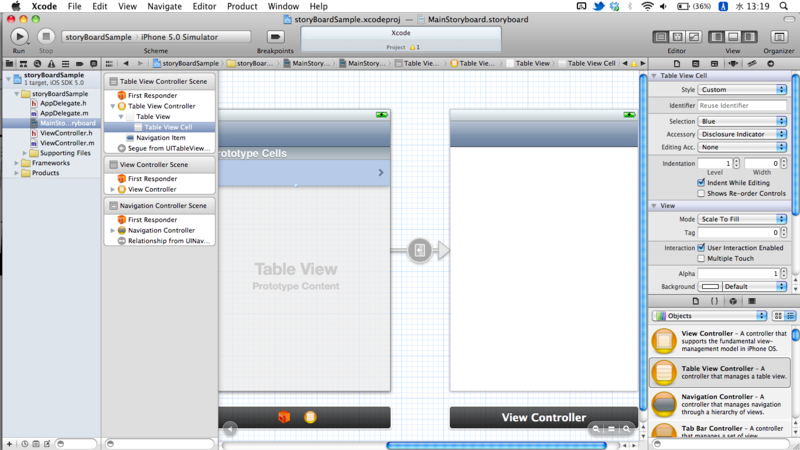
じゃん。segueができました。
ちゃんとナビゲーションバーも出てきます。
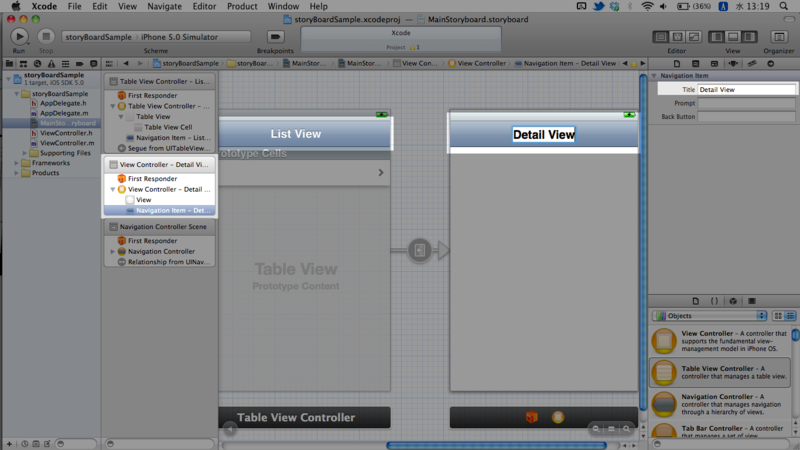
わかりやすいように、ナビゲーションバーにタイトルをつけます。
バー中央をダブルクリックするか、右ペインのTitleにそれぞれ"List View" "Detail View"と入力。
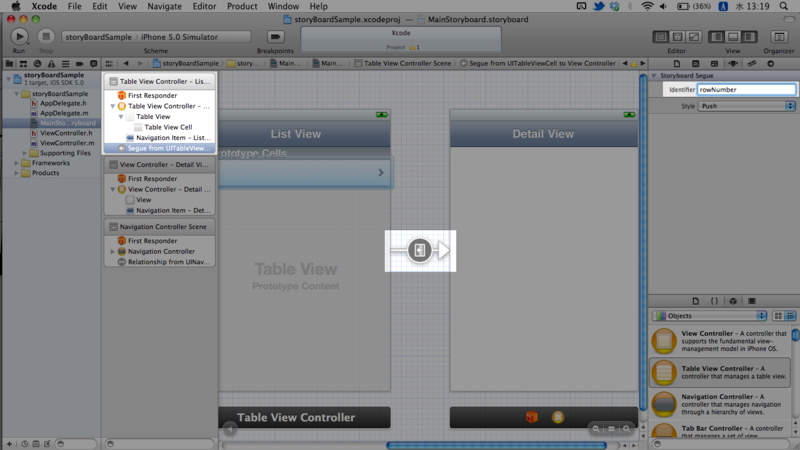
先ほど作成したsegueをクリックし、右ペインのIdentifierに"rowNumber"と入力。
デバッグ用に、ViewControllerにLabelを置いておきます。
ここでは"row number"と変えてありますが、そのままでも大丈夫です。
-
- TableViewControllerのクラスを作成
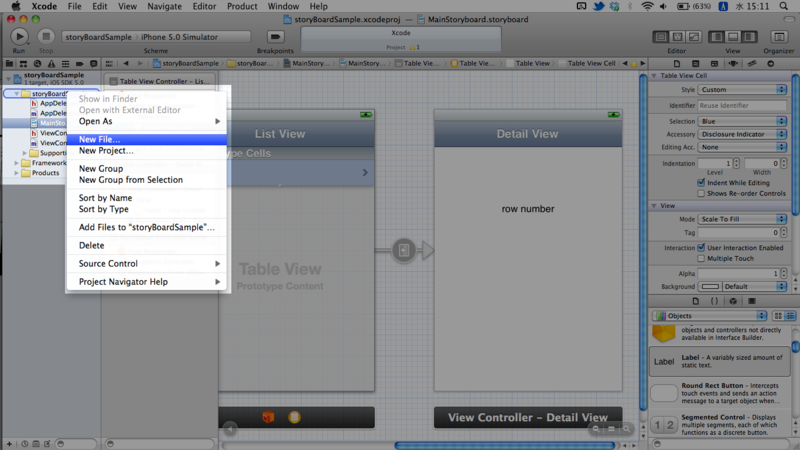
左ペインのStoryBoardSampleフォルダを右クリックして、New File...を選択。
UIViewController subClassを選び、
クラス名を"ListViewController"に。
ドロップダウンからUITableViewControllerを選択、下ふたつのチェックは外して、作成。
-
- storyboardと紐付け
いったんstoryboardに戻り、TableViewControllerを選択。
右ペインの「Identity Inspector」で、ListViewControllerクラスを紐付け。
-
- コードの書き換え
まず、ListViewController.mから。
生成するセクションとセルの個数を変更します。
- (NSInteger)numberOfSectionsInTableView:(UITableView *)tableView
{
#warning Potentially incomplete method implementation.
    // Return the number of sections.
    return 0;
}

- (NSInteger)tableView:(UITableView *)tableView numberOfRowsInSection:(NSInteger)section
{
#warning Incomplete method implementation.
    // Return the number of rows in the section.
    return 0;
}
この戻り値を、1セクション、3セルに変更。
#warning〜も取ってしまいます。
- (NSInteger)numberOfSectionsInTableView:(UITableView *)tableView
{
    // Return the number of sections.
    return 1;
}

- (NSInteger)tableView:(UITableView *)tableView numberOfRowsInSection:(NSInteger)section
{
    // Return the number of rows in the section.
    return 3;
}
セル内には、何番目かを表示させるようにします。
- (UITableViewCell *)tableView:(UITableView *)tableView cellForRowAtIndexPath:(NSIndexPath *)indexPath
{
    static NSString *CellIdentifier = @"Cell";

    UITableViewCell *cell = [tableView dequeueReusableCellWithIdentifier:CellIdentifier];
    if (cell == nil) {
        cell = [[UITableViewCell alloc] initWithStyle:UITableViewCellStyleDefault reuseIdentifier:CellIdentifier];
    }

    // Configure the cell...

    return cell;
}
これを、
- (UITableViewCell *)tableView:(UITableView *)tableView cellForRowAtIndexPath:(NSIndexPath *)indexPath
{
    static NSString *CellIdentifier = @"Cell";

    UITableViewCell *cell = [tableView dequeueReusableCellWithIdentifier:CellIdentifier];
    if (cell == nil) {
        cell = [[UITableViewCell alloc] initWithStyle:UITableViewCellStyleDefault reuseIdentifier:CellIdentifier];
    }

    // Configure the cell...
    cell.textLabel.text = [NSString stringWithFormat:@"%d", indexPath.row];

    return cell;
}
一行追加。
indexPath.rowで、いま作っているセルが何番目かを取得できます。
デリゲートメソッドも変更。
- (void)tableView:(UITableView *)tableView didSelectRowAtIndexPath:(NSIndexPath *)indexPath
{
    // Navigation logic may go here. Create and push another view controller.
    /*
     <#DetailViewController#> *detailViewController = [[<#DetailViewController#> alloc] initWithNibName:@"<#Nib name#>" bundle:nil];
     // ...
     // Pass the selected object to the new view controller.
     [self.navigationController pushViewController:detailViewController animated:YES];
     */
}
ViewControllerに遷移するように書き換えます。
- (void)tableView:(UITableView *)tableView didSelectRowAtIndexPath:(NSIndexPath *)indexPath
{
    NSUserDefaults *ud = [NSUserDefaults standardUserDefaults];
    [ud setValue:[NSString stringWithFormat:@"%d", indexPath.row] forKey:@"num"];

    [self performSegueWithIdentifier:@"rowNumber" sender:self];
}
上の二行は、NSUserDefaultsという便利箱に今何番目が選択されたのかを収納しています。
performSegueWithIdentifierメソッドは、引数のIdentifierをもつsegueでつながっているControllerに遷移しますよ、というもの。
ここまででいったん起動すると、こんな感じ。
ちゃんと行き来はできますが、どのセルが選択されたかわからないため、細工を加えます。
-
- Labelの紐付け
editorの分割をAssistant editorにして、左側にstoryboard、右側にViewController.hを表示します。
storyboardのラベルをクリック、右までcontrol+ドラッグして、"@interface ViewController : UIViewController"の下ではなします。
名前は"numberLabel"として、OK。
次に、ViewController.mを一箇所書き換えます。
- (void)viewDidLoad
{
    [super viewDidLoad];
	// Do any additional setup after loading the view, typically from a nib.
}
ここに、二行追加。
- (void)viewDidLoad
{
    [super viewDidLoad];

    NSUserDefaults *ud = [NSUserDefaults standardUserDefaults];
    numberLabel.text = [ud valueForKey:@"num"];
}
先ほど収納した便利箱から値を取り出して、ラベルのテキストに入れています。
実行してみます。
-
- 完成
次回はこれとLocal Notification(通知センター)を組み合わせて、自分用ユーティリティアプリをつくります。

